ShareThis
Warning—Very minimal spoilers ahead!
The Legend of Zelda: Breath of the Wild is truly a watershed moment in video game history. Sure, it’s not the first open-world adventure game, but few have ever demonstrated the level of polish found in Link’s latest outing. Animals interact with enemies, enemies interact with each other, heck, sometimes enemies will attack one another! Stepping out of the Shrine of Awakening and onto the Great plateau for the first time can be intimidating for many, however, so we’ve decided to put together a list of survival tips for the game’s opening moments and beyond! Even if you’ve battled your fair share of Guardians there are pearls of wisdom to be found here, so get to reading and discover something new!
1. Seek Out the Towers
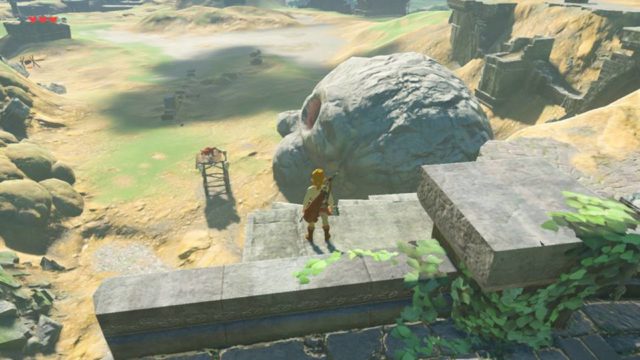
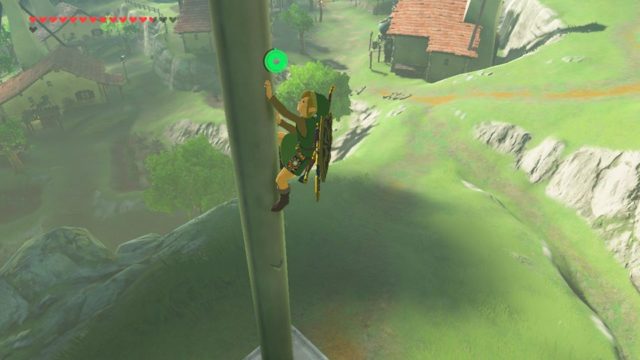
Sheikah Towers dot the landscape of Breath of the Wild‘s Hyrule. At the beginning of the game they loom like glowing specters, but don’t let their fiery forms intimidate you—they’re of huge importance for the duration of the adventure. Each one is something of a challenge, with different hazards and surroundings pushing players to think of new and different ways to reach the top.
I spent hours unlocking all of the towers before I even got within sniffing distance of my first Divine Beast. It might not seem like the most necessary task, but it pays big dividends in the long run. As you plug away at side quests and just explore Hyrule in general, it’s easy to end up straying very far from the beaten path. Unlocking towers makes it much easier to navigate the environment as each one enables yet another chunk of the map to appear on the Sheikah Slate.
That said, it can be tough to scale every tower, especially early in the game when Link isn’t powered up as much. There are workarounds, like climbing to higher points on nearby cliffs and the tops of structures in order to avoid seemingly insurmountable hazards, but there are other ways, too. I found myself tackling shrines as frequently as possible in order to maximize Link’s Stamina Gauge, which is key for some of the trickiest towers. This was a real boon to me as I confronted the Divine Beasts, because from the outset I had Link fairly pumped up for battle, as a result.
2. Shrine Smasher
Shrines act as dungeons in this game, but are notable for their brevity and intimacy this time around. Beating each one rewards Link with a Spirit Orb; collect four and they can be traded in at a Goddess Statue for either a Heart Container or a Stamina Vessel. Both are critical for getting through Breath of the Wild, so it behooves players to conquer as many as possible. One of the brilliant things about this game is that there’s no true set order to completing any of its tasks, which means there’s no reason to avoid any particular Shrine that a player comes across. If it’s visible it’s available to be explored, unless there’s a hazard that you simply don’t have the equipment to overcome.
Outside of needing new gear, sometimes there are combat challenges within shrines that will also send intrepid explorers packing. Without the gear required to battle the Guardian Scout within, it’s alarmingly easy to expend every single bit of weaponry and shields in your inventory just to take down one of the higher level mechanized enemies. If you’re feeling daring then by all means, barrel on through, but if you’re looking to be a bit more tactical, cherry pick what shrines you can and can’t handle. Once Link has activated a shrine with his Sheikah Slate it will become a travel point, so you’re free to come back later to give it a go. Just remember, more shrines means more spirit orbs, which in turn means more Hearts and more Stamina!
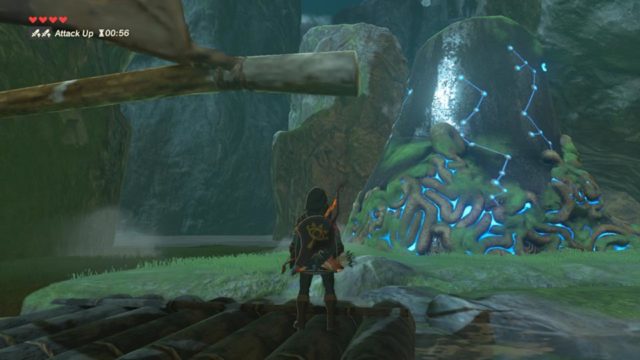
3. Travel the Ocean Blue
Rafts are peppered throughout the watery areas of the game, but there’s no clear instructions given as to how to use them. Fret not, though, as there’s no special ability or upgrade needed to get Link out onto the open seas. First off, check to see if the boat is tethered down; if it is, use something sharp to cut the rope. Second, search nearby, as generally there will always be a Korok Leaf or two nearby, which are essential for maneuvering across the water. Rafts tend to be near areas that Link can’t access without them, so be sure to hop on them whenever you see one in order to discover shrines, weapons, and Rupees that you might miss otherwise.
Bonus Tip: No Korok Leaf? No problem! Take out a metal item like a broadsword, use Magnesis, and then thrust it towards the mast of the raft. It will propel the craft forward wherever you aim!
4. Make Friends With Dogs
Okay, this one is more for fun, but it can be useful and it’s easy to do right out the gates! Link runs into bevies of canines in Breath of the Wild, but unlike Twilight Princess where he could pick them up and run around with them cradled in his arms, it takes a little more effort to get man’s best friend to warm up to him in this game. Crouch down in front of a dog and stare it in the eyes until hearts start floating around—that means the pair have bonded. At that point, throw three pieces of meat or fruit onto the ground and Link’s new pal will gladly lead him to a nearby secret. Dogs can be spotted a variety of places, but they’re especially common in and around stables.
5. Horsing Around
While a horse isn’t required to travel anywhere in the game, it’s highly recommended to wrangle one simply to be able to get around more quickly. This is the largest Hyrule yet seen in the series, and it can take quite a while to get places on foot alone. Thankfully there are a bevy of steeds to choose from and numerous locations to find them. There are a number of places where horses can be found congregating, including Hyrule Field, Dueling Peaks, up in the Akkala region, and more.
There are multiple factors to consider when trying to get hold of a horse, however. Make sure that you’re within reasonable distance of a stable, for starters. If Link tames a horse but doesn’t register it, your new companion will be lost. It’s also critical to target what sort of horse you want to make yours. Spotted ones are on the docile end of the spectrum and great for newbie riders. Solid color horses tend to be more wild and harder to tame, but are ultimately faster and better steeds.
With that in mind, make sure your Stamina Gauge is decently robust if you want to get yourself a more powerful horse. There are also a few special horses out in the wild to get ahold of—we’ll touch on them in another feature!
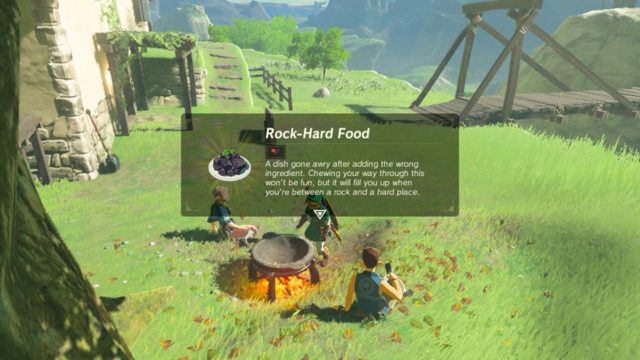
6. Kiss the Cook
A series first, Link can play Iron Chef in Breath of the Wild, pulling from a wide variety of meats, veggies, fruits, and other ingredients to create a plethora of dishes. It’s possible to have Link rough it and eat every individual ingredient raw like a barbarian, but those cooking pots are out there for a reason: cooked food restores greater amounts of health and bestows an array of buffs on Link to make him stronger, faster, sneakier, and more!
Cooking in Breath of the Wild is clearly a lot faster and simpler than it is in real life, but that doesn’t mean it’s completely incongruous with preparing food in reality. When experimenting with dishes keep in mind basic tenets of cooking. Would you pair meat with a precious stone in your own kitchen? Hopefully your response was “no”, because it doesn’t work in this game, either! Meats go with salt and veggies, fruit pairs well with sugar and wheat, and so on. There are recipes to found about Hyrule, such as on the walls of stables, but it’s also possible to discover new things by experimenting.
Bonus Tip: Cooked meals can be sold for a high price, particularly if valuable/rare ingredients were used in their preparation. Sometimes the sum of a dish can be worth more than the individual components would have been worth if sold separately!
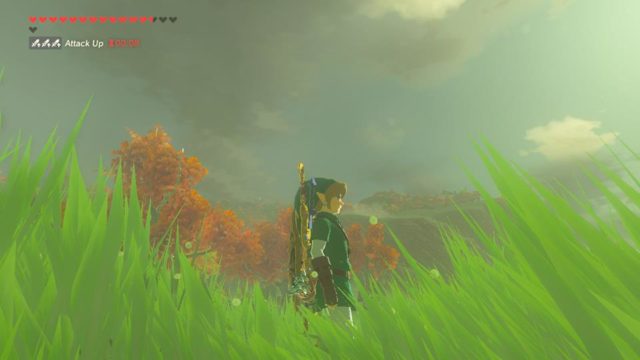
7. Seeding the Future
Korok Seeds (of which there are 900!) can be found in a ton of different places around Hyrule, but you have to complete small tasks to earn them. There are a variety of ways to get Link’s hands on them:
- Complete the Rock Rings: There are multiple circular formations of rocks to find, and there’s always one (or more) missing from the circle when you stumble across them. Search the nearby surrounding area (you never have to go too far to find the outlier) for the one(s) missing and then put it in its place—a Korok will appear and give you a seed!
- Stand on the Leaf Stumps: There a number of stumps to discover bearing a leaf impression on top. Stand on these stumps in order to activate a speed challenge. You can see your goal in the distance once the challenge begins; it will appear as a ring of colored orbs. As the timer ticks down orbs will disappear, so rush over to claim your seed!
- Peep those Pinwheels: Don’t ignore pinwheels when you see them—those signify yet another Karok Seed opportunity! Stand near them and balloons with propellers will appear. Shoot them out of the sky before time runs out in order to get another seed.
- Watch (and Listen) for Koroks: Ever seen a mass of colorful sparkles zooming around? Those are Koroks in stealth mode just waiting for Link to run up and snag them! You can also hear their distinct wooden clicking sound, which is similar to the noise that a wood wind chime makes.
- Make an Offering: If you’ve spotted statues around Hyrule with fruit placed in them, know that they’re not just for decoration—Link can make his own offering in order to lure out a Korok. Simply match the same type of offering that’s at the other statues and place it into the empty slot(s) to get a seed.
- Matchmake the Trees: Sometimes there are three trees clustered together in a line and all bearing the same fruit. The only difference between them will be how many pieces of fruit each tree has. Pluck off the excess to make it so that the trees all have the same amount and a Korok will reward you with a seed.
- Put the Rock in the Hole: Sometimes there will be rocks attached to chains that can be manipulated with the Magnesis Rune: simply take the hunk of metal and plop it into the hall of the tree that it’s attached to. There are also times when Link can roll a large boulder into a hole in the ground. Both of these puzzles will unleash a friendly gift-bearing Korok into the wild.
- Correct the Cubes: When you come across carefully stacked cubes in the wild, usually arranged into two separate structure: note that they’re yet another challenge from the Koroks. Activate Magnesis to find the cube that’s made of metal and put it into position so that the two structures are twins. Claim your seed!
- Guide the Rock to the Goal: Sometimes you’ll find a small cluster of boulders but no hole to put them in. That’s because these large rocks must be guided to a nearby “goal”, usually denoted by two trees with a small space between them. Once the boulder has passed through you’ll get another seed.
- Follow the Flowers: Large flowers can be found at random throughout Hyrule, and they can lead to a Karok in one of two ways. Sometimes there will be a single flower to touch; doing so will make it disappear and pop up somewhere nearby, with Link having to touch it each time until a Korok pops out. Other times, there will be a set of one, two, three, four, and five flowers that must be touched in order from low to high. Doing so will unlock a seed!
- Melt the Ice: If you spot a large chunk of ice, odds are that melting it will make a Korok pop out! If you happen to have a flame weapon handy, you can simply pop it out and stand near the ice to make it melt away.
- Land Between the Lilies: Rings of lilies in the water are yet another signifier of a Korok hiding place: the goal is to dive roughly in the center of the ring to earn your seed!
- Reach for the Rocks: Simply lifting a rock will often result in a Korok appearance. While you can try lifting every rock you see, it’s best to focus on ones in out of the way and odd places. Burn a pile of leaves and find a rock, or scale a large mountain and discover one, and odds are it’s just begging to be picked up to reveal a Korok. Alternatively, sometimes there are small circles of rock “fingers” poking out of bodies of water: fling a rock into the center of the formation to get yet another seed.
So what’s the point of all these seeds, anyway? Well, they’re the only way to increase Link’s paltry inventory! From swords to shields to bows, Link needs these seeds to keep adding slots for each. To give Link more storage, you’ll need to trade them in to the rather… odd Korok named Hestu. Hestu is much larger than any of the other Koroks and can be found in three different places:
- South of Kakariko Village: The first time you meet Hestu you’ll have to recover his stolen maracas. From that point, you can pay him two times to increase you inventory space before he moves to a new location.
- North of Owlan Bridge, Near Riverside Stable: This is the second place Hestu will call home. Pay him six times for inventory expansion and he’ll move to his final destination.
- Alternate Second Spot, Near Woodland Stable: If Hestu isn’t found in the above location, then search for him here. Again, pay for upgrades six times and Hestu will go to his final spot.
- Korok Forest, Inside the Lost Woods: Once Hestu lands here, he won’t go anywhere else. needless to say, getting to Korok Forest is a bit of a journey, one we’ll be covering in another article! Let’s just say Hestu isn’t the only reason to venture into the Lost Woods…
8. Great Fairy Fashionistas
Great Fairies have returned for Breath of the Wild, and this time around they’re invaluable for upgrading Link’s outfits! There are three categories of armor: headgear, tops, and bottoms. All three can be upgraded depending on what it is, and each will require a certain number of specific materials in order for the fairy to work her magic. Before each fairy can start crafting, however, she’ll need to be paid in order to open up shop. The prices and locations for each Great Fairy Fountain are listed below—note that the location of a given fairy doesn’t impact the price, but rather the order that you find them in:
- Prices: 100 Rupees, 500 Rupees, 1,000 Rupees, and finally 10,000 Rupees.
- Locations: Be mindful that as you search the fountains will be hidden away inside of what look like giant flower buds:
- Cotera—The hills above Kakariko Village.
- Kayasa—South of Totori Lake and Rito Village. Spot it from Tabantha Tower and you can glide all the way down to it!
- Mija—Southeast of Lake Akkala. Visible from Akkala Tower.
- Tera—Southwest of Dragon’s Exile. Look for a big skeleton and she’ll be under it.
There’s a fifth bonus fairy to be found in the form of Malanya the Horse God. She’s unique amongst her sisters in that she only acts to revive horses that have died. She’s south ofHighland Stable (near Lake Hylia) and will charge 1,000 Rupees regardless of what order you find her in.
9. Wield Weapons Wisely
One of the more heartbreaking aspects of Breath of the Wild is the fact that there’s only one unbreakable weapon and a handful of others that can be repaired. Otherwise, everything else is fair game to break down into so many pieces of shrapnel after too many blows have been landed. That means it’s crucial to be smart with what weapons you take into battle. If you’re taking out some low-level baddies stick with more common weapons; don’t waste a Great Thunderblade to take down a handful of Bokoblin archers, for instance.
In the early parts of the game it can be easy to run out of weapons. To help keep this from happening too often, keep an eye out for enemy camps. Use stealth blows to kill unaware sentries and bombs to scatter foes if they’re clumped together (just don’t blow yourself up in the process!). This can yield a bunch of different bows, swords, arrows, and more to take with you as you continue your journey to slay Ganon. Sometimes these camps can even be home to rare materials and weapons!
10. Dress to Kill
Link has always been able to change his outfits, but never before has his wardrobe been as versatile as it is in Breath of the Wild. In order to survive certain environmental conditions like extreme cold and heat, Link must wear armor that guards him against the elements. New armor can be found a variety of different places like shops and vendors, but there are also pieces hidden around Hyrule in shrines and other spots. While goodies like the Climbing Gear require some extra effort to obtain, others like the Flamebreaker set, which is paramount to get around Death Mountain, are relatively easy to get—so long as you’ve saved up the money! Elixirs and food can also work in a pinch, but if you really want to get into every nook and cranny in Hyrule, armor is the way to go, as there’s no time limit to its use and will never break or wear out.
These are some of the most basic (but essential) survival tips for Breath of the Wild, but we’re not stopping here: tune in for a look at some of the secrets in the game that are just begging to be uncovered!