


 ShareThis
MAJOR SPOILERS AHEAD!
The Legend of Zelda: Breath of the Wild has a ton of stuff to find just by treading on the beaten path to restore the four Divine Beasts and defeat Ganon, but straying from it will lead you to multitudes of hidden items and weapons, as well as other lesser-known oddities. A shop for monster parts? A certain Blade of Evil’s Bane? If you’re looking to up your game in Breath of the Wild, read on for some of the best secrets and obscurities Link’s latest adventure has to offer!
1. THE MASTER SWORD

Believe it or not, the most famous sword in The Legend of Zelda franchise can actually be left by the wayside and never even seen in Breath of the Wild. The only real mention of the Master Sword comes from the leaders of the four different races of beings scattered across Hyrule, but their hints are vague and don’t do a lot to set players on the right path to finding it. Travelers and other residents of Hyrule make mention of it, too, but for those of you who’ve been wanting to cut (a pun!) to the chase and snag the iconic blade, read on!
The Lost Woods
The Lost Woods is where you’ll find the Master Sword waiting for you, but just the act of getting there is going to be a challenge—it seems safe to assume that the legendary blade doesn’t want to be found. That being the case, you’ll have to navigate the winding paths of trees shrouded in fog to get to it. Unfortunately, the Lost Woods doesn’t have much patience for Link feeling his way around, as he’ll be transported back to the entrance every time he strays from the right path for too long.
As such, you’ll have to carefully navigate the woods without hesitation. Getting to your destination is itself a bit tricky, as it’s located inside of Great Hyrule Forest, which in turn is north of Hyrule Castle. You’ll know you’ve gotten within sniffing distance of the woods when you come across a section of forest separated by water on all sides. It’s easy to spot from the Woodland Tower, but don’t attempt to glide into the woods from any direction, as you’ll immediately be teleported away.

As opposed to flying in, hit the ground and travel to the northwest of Woodland Tower. The actual opening into the Lost Woods is a stone arch; once the air starts filling with mist you should see it not before long. Past the arch is a lit torch—snag it, as it’s the only means of getting your bearings when moving through the woods. There won’t be any signs or indicators to tell you’re on the right path other than the torch itself.
From the point you pick up the torch, look at the embers floating off the top of it: that’s your clue as to where to go. The glowing flakes will float ever so slightly in the direction that Link should be walking. Deviate and he’ll be sucked up by the fog and deposited back at the arch. Though you must follow the smoldering ash in order to get to Korok Forest, here’s a general breakdown of the directions Link should be going:
North-North-West-West-South-West
At this time, Link will have stumbled upon a chest sitting in the maw of a large tree, with a couple of braziers to light and an unlit torch sitting to the side. Refresh your flame with a new torch and set out once more, again using the embers as a guide. Follow them and Link will finally have arrived at his destination!
Korok Forest & The Blade of Evil’s Bane

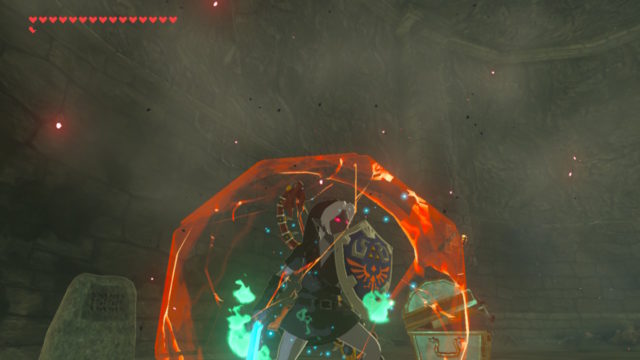
Inside of Korok Forest the atmosphere will have completely transformed compared to the gloom and fog you were just winding through outside. Shafts of sunlight pierce the lush green canopy overhead as a familiar (for series veterans, at least) face will appear—that of the Great Deku Tree! The benevolent forest dweller will point out the Master Sword to Link, prompting the hero to pull the blade from its pedestal. However, as Link tugs on the sword, it begins sucking away his health right up to the edge of death. It turns out that Link won’t have the ability to wield the Master Sword until he has accumulated thirteen hearts.
Considering it takes four Spirit Orbs to get a Heart Container (not counting the ones you can earn from freeing a Divine Beast), it’s going to take quite a stretch of time to get Link positioned so that he can draw the Master Sword from its resting place. Note that buffs don’t count towards the thirteen heart criteria, so don’t bother trying to hoard foods and dishes to artificially bump up Link’s number—only the real deal will suffice. Hunting down shrines is clearly the only way to get the hero to the point of having thirteen hearts, but there is a trick available to players who find the Master Sword a little later in their adventure—so long as you have the cash to pull it off! Read the next section to find out how.
2. THE HORNED STATUE

The Horned Statue can be found in Hateno Village, but it’s tucked away in an odd spot and is easily missed. To locate it, speak to the little kid Teebo, who will ask Link to follow him and then promptly lead them over towards a pathway near the hero’s house. It’s there that the ebony specter can be found sitting near the north side of Firly Pond.
Upon speaking to the Horned Statue, it will express surprise that Link can hear it. The statue will then tell Link that it once was “a dealer in life and power” who was subsequently locked inside of its current form by the Goddess Hylia for the “life-for-money bargains” it once offered to people. Rather than learn from its past mistakes, the statue wants to continue on with its old way, proposing to Link that it will exchange his Heart Containers for Spirit Vessels (and vice versa).
Speaking to the statue will initiate The Horned Statue side quest: first, give it one of your Heart Containers or Spirit Vessels and you’ll get 100 Rupees. You can walk away with the cash, but the real goal is to switch out whatever you just traded for the opposite upgrade. Next, talk to the statue again and it’ll offer to let you get whichever upgrade you want for 120 Rupees. It’s an odd barter that the statue makes, but for what basically amounts to 20 Rupees, it’s not all that expensive and can be very useful. Make the trade and the side quest will be complete.
As noted above, Link will need thirteen hearts to wield the Master Sword, so this can be a life saver if you’ve been investing in Stamina Vessels over Heart Containers for a while. Swap them out and the sword can be yours! Also, if you’ve been getting tripped up either by a powerful enemy or haven’t had the stamina for certain challenges, then this can also be a great way of overcoming adversity. Just remember that there’s a finite number of Spirit Orbs to collect, so no matter how many times you swap, eventually you’ll accumulate all of the Heart Containers and Stamina Vessels in the game, so trade freely!
3. KILTON
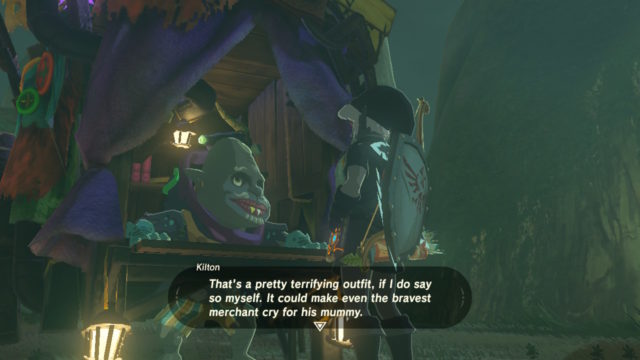
Kilton the monster parts merchant is an odd fellow. He runs a small shop called Fang and Bone but doesn’t have any interest in his customers’ Rupees—instead, he prefers to deal in his own currency dubbed Mon. How do you get Mon? Trade in Monster Parts! Take all those Bokoblin Horns and Hinox Guts you’ve been accumulating and hand them over to Kilton in order to get hold of unique goodies like monster masks that allow you to pass by (some) baddies undetected (let’s just say that Lynels can only be fooled for so long), as well as perhaps the coolest armor set in the game: the Dark Hood, Trousers, and Tunic! It makes you a dead ringer for Dark Link in Ocarina of Time!
The Road to Kilton
So you want to meet Kilton, but where the heck is he? Interestingly enough, he’s approachable right from the outset of the game, but it requires a long journey to Akkala in the northeast. You can get there without the use of the map, but for convenience sake we’re going to recommend activating Akkala Tower before seeking out the monster parts peddler.

Once you finish with the tower, head to East Akkala Stable, which is in the southeast of the Deep Akkala region. After you arrive, speak with the mercenary Moz, who will be standing around outside of the stable. This will activate the Shady Merchant side quest, which ultimately leads to Kilton. Now go to Skull Lake, which you can spot in the northwest of the Akkala Region—it looks like a skull!

In relation to the map, Kilton will appear on what is the left eye of the skull, but only at night. You can’t miss him: he has an enormous hot air balloon attached to his back that floats overhead (it’s also very colorful and lit up). When you meet Kilton, he gets a tad bit freaked out by Link, but quickly warms up to the hero. He won’t sell anything to Link during this initial interaction, but do take the opportunity to snap a picture of Kilton for Moz!
Grand Opening: Fang and Bone

With the Shady Merchant side quest complete and Kilton now officially an acquaintance, Fang and Bone will be open for business each night. The catch is that it will be at a different location every time and you won’t know where! It shouldn’t be too hard to spot him, however; Kilton always appears at night and will set up shop on the outskirts of major towns like Kakariko Village, Hateno Village, Lurelin Village, and so forth.
Remember, Fang and Bone is worth visiting thanks to all the exclusive items and gear that can be obtained there. Here’s a full listing of what’s available:
- Monster Extract (9 Mon)—Use in cooking to effect buffs.
- Monster Bridle (399 Mon)—Alters your horse’s head.
- Monster Saddle (299 Mon)—Alters your horse’s body.
- Wooden Mop (19 Mon)—Use as a spear in combat.
- Spring-Loaded Hammer (199 Mon)—Does low-level damage, but is notable for launching enemies with the fourth swing.
- Bokoblin Mask (99 Mon)—Blend in with Bokoblins.
- Moblin Mask (199 Mon)—Blend in with Moblins.
- Lizalfos Mask (299 Mon)—Blend in with Lizalfos.
- Lynel Mask (999 Mon)—Blend in (temporarily) with Lynels.
- Dark Hood (1,999 Mon)—Armor set bonus boosts movement speed at night.
- Dark Tunic (999 Mon)—Armor set bonus boosts movement speed at night.
- Dark Trousers (999 Mon)—Armor set bonus boosts movement speed at night.
Medals: Once you’ve beaten Breath of the Wild for the first time, return to Kilton and you can begin undertaking the challenge of killing enough monsters to earn medals.
- Medal of Honor (Talus)—Kill 40
- Medal of Honor (Hinox)—Kill 40
- Medal of Honor (Molduga)—Kill 4
4. MOUNTS
Horses dot the landscape of Hyrule and in our Survival Guide for Breath of the Wild we examined where to find them and how to tame them. This time around, we’re going to look at the special, secret horses that can be obtained.

Lord of the Mountain—Also known as Satori, the noble spirit horse can be found atop Satori Mountain. It appears at night infrequently; you’ll know it’s on the mountain when an intense bluish glow is being emitted into the air. To spot the exact spot where the horse will spawn, simply look for the small pond ringed with cherry blossom trees with pedals in the water.
It must be stealthily approached in order to be mounted—be sure to either have a maxed Staina Wheel or multiple buffs in supply. Satori is the most powerful horse in the game: all of its stats are maxed and it’s lightning fast! Unfortunately, it isn’t possible for the horse to be registered and it will soon vanish once Link has dismounted it. It will, however, remain with you until you decide to get off.
And no, that’s not a coincidence—Satori does sound a lot like Satoru. It’s all part of a touching tribute to deceased Nintendo President Satoru Iwata!

Epona—Sadly, Link’s noble steed is only available via his Super Smash Bros. Amiibo. Scan the figurine and she’s yours. Epona comes with maxed stats and affinity, but her name, bridle, and saddle are not customizable. Epona can be scanned into the game repeatedly until you register her at a stable. Note that she can die in battle, but is revivable at the hands of the Horse God Malanya. There is no side quest associated with Epona.

The Royal White Stallion—Chat with Toffa at Outskirts Stable to begin The Royal White Stallion side quest. The titular horse is reputedly a descendant of Princess Zelda’s legendary steed, and Toffa tasks you with finding it. Set out from the stable and head north on the road. When you arrive at the first fork in the road, head right and cross Manhala Bridge. After that, you’ll continue down the road going right, then wind your way around the hill that you find. The horse will be in this area.
The white steed is incredibly skittish—she wants nothing to do with Link and will bolt with little provocation. I used the Sheikah Stealth Set of armor to sneak up on the stallion (with the Sheik Mask on instead of the Stealth Mask because, well, it looks way cooler and you’re basically Sheik on Zelda’s horse!). You can choose to use elixirs and food buffs to sneak up, too, but ultimately how you get to the royal steed is up to you—just know it’s going to take a ton of stamina to tame it!
Once the horse is in your possession, register it and then return to Toffa. Not only will you have completed this side quest, but he’ll also reward you with the Royal Bridle and Sidle for your efforts. You’ll have to build up your connection to the royal stallion, but it proceeds a bit faster than with Epona and well worth the investment.

The Giant Horse—Speak to Straia at the Mounted Archery Camp (which can be found west of Highland Stable) in order to begin the Hunt for the Giant Horse side quest. She’ll give you word of an enormous horse that has taken up residence in Taobab Grasslands. From the camp, head east of Staltry Plateau and west of Mount Florea to reach the grasslands.
The gigantic horse can’t be missed, as its flocked by a cluster of smaller horses and has a blazing red mane. Like all horses, it must be quietly approached. Don’t disturb any of the other, regular sized horses, either, or your large target will flee. As per usual, be ready for a fight—a high level Stamina Wheel and/or plenty of buffs will be needed to tame it.
Once atop the large steed, head back to the archery camp… but expect to get there by the skin of your teeth. The closest path back to a stable is littered with enemies, so it will be quite a challenge to get this horse registered. Once you’ve gotten it tagged and tamed, head on over to the Mounted Archery Camp and complete the Hunt for the Giant Horse side quest.
The game doesn’t state this, by the way, but one can’t help but notice how similar this stallion looks to the horse of a certain nefarious villain in the Zelda series… hmm…
5. AMIIBO
Any Amiibo will work in Breath of the Wild (including Amiibo cards), but if you desire more than just cooking ingredients, you’re going to want to get hold of various The Legend of Zelda series Amiibo. There are five figures exclusive to Breath of the Wild, five 30th anniversary figures, and four Super Smash Bros. figures. All grant different items and treasure chests. We’ve listed the figures and their corresponding item drops, but for a nice visual guide hit up this link. Shoutout to Shugo Takahashi and company!
BREATH OF THE WILD SERIES
Archer Link:
- Materials—Fish, meat, and poultry.
- Weapons—Fire, Ice, and Shock Arrows. Bows. Falcon Bow (rare).
Rider Link:
- Materials—Mushrooms.
- Weapons—Fire, Ice, Shock, and Bomb Arrows. Swords. Moonlight Scimitar (rare).
- Gear—Traveler’s Bridle and Saddle.
Zelda:
- Materials—Flowers, herbs, and vegetables.
- Rare Gems—Diamonds, Rubies, Sapphires, Topaz, Luminous Stones, Amber, and Opals. Star Fragment (rare).
- Weapons—Shields. Radiant Shield (rare).
Bokoblin:
- Materials—Meat and Bokoblin Guts.
- Weapons—Boko clubs, shields, and bows.
Guardian:
- Materials—Ancient machine parts. Ancient Cores (rare).
- Rare Gems—Diamonds, Rubies, Sapphires, Topaz, Luminous Stones, Amber, and Opals.
- Weapons—Guardian Battle Axes, Swords, Shields, and Spears. Ancient Arrows (rare).
30th ANNIVERSARY SERIES
Ocarina of Time Link:
- Materials—Meat.
- Armor—Cap, Tunic, and Trousers of Time.
- Weapons—Swords. Fire, Ice, Shock, Bomb, and regular Arrows. Biggoron Sword (rare).
8-Bit Link:
- Rupees—Green, Blue, Red, Purple, and Silver.
- Armor—Cap, Tunic, and Trouser of the Hero.
- Weapons—Swords and shields. Fire, Ice, Shock, Bomb, and regular Arrows. Sword (rare).
Toon Link:
- Materials—Fish.
- Armor—Cap, Tunic, and Trousers of the Wind.
- Weapons—Swords and boomerangs. Fire, Ice, Shock, Bomb, and regular Arrows. Sea-Breeze Boomerang (rare).
Toon Zelda:
- Materials—Flowers, herbs, and vegetables.
- Rare Gems—Diamonds, Rubies, Sapphires, Topaz, Luminous Stones, Amber, and Opals. Star Fragment (rare).
- Weapons—Shields. Hero’s Shield (rare).
Wolf Link and Midna:
- Unique amongst the Zelda Amiibo, this figurine simply brings Wolf Link into the game. By default it will have three hearts; to increase its health, complete the Cave of Shadows challenge in Twilight Princess HD and the number of hearts you have at that time will carry over into Breath of the Wild. Wolf Link cannot be seen by NPCs, but it will attack enemies, seek out shrines, and hunt. It can be summoned multiple times throughout the day unless it’s killed, in which case you must wait 24 hours before scanning it again.
SUPER SMASH BROS. SERIES
Link:
- Materials—Fruit and nuts.
- Armor—Cap, Tunic, and Trousers of Twilight.
- Mount—Epona.
- Weapons—Swords and shields. Fire, Ice, Shock, Bomb, and regular Arrows.
Zelda:
- Materials—Flowers, herbs, and vegetables.
- Rare Gems—Diamonds, Rubies, Sapphires, Topaz, Luminous Stones, Amber, and Opals. Star Fragment (rare).
- Weapons—Bows. Twilight Bow (rare).
Ganon:
- Materials—Bokoblin Guts and Lizalfos Tail. Lynel Guts (rare).
- Rare Gems—Diamonds, Rubies, Sapphires, Topaz, Luminous Stones, Amber, and Opals. Star Fragment (rare).
- Weapons—Swords and regular Arrows. Sword of the Six Sages (rare).
Sheik:
- Materials—Mushrooms and truffles.
- Armor—Sheik’s Mask (rare).
- Weapons—Swords and Shield of the Mind’s Eye. Fire, Ice, Shock, Bomb, and regular Arrows.
Toon Link:
- Materials—Fish.
- Armor—Cap, Tunic, and Trousers of the Wind.
- Weapons—Swords and boomerangs. Fire, Ice, Shock, Bomb, and regular Arrows. Sea-Breeze Boomerang.
Amiibo offer a ton of exclusive armors and weapons, but they also provide a wealth of useful materials and gems, too, making the figurines indispensable. They’re limited (with the exception of Wolf Link) to a single scan per day, which can make getting a particular item an excruciating ordeal of extreme patience. Luckily, there are a couple of ways around this.
- Scum Save—Repeatedly load your last save file and scan Amiibo until you get the item you want. The item drops are random, so if you didn’t get what you wanted the first time, simply keep loading your save file until you do.
- Advance the System Clock—Switch uses the internet to automatically sync its date and time, but this feature can be shut down and done manually, instead. Use this to your advantage by pushing the calendar to the next day so that you can keep scanning your Amiibo. This is a great way of farming materials and unlocking armors and weapons. We recommend setting the year all the way back to 2060 (the farthest year the system will go)—this way, you don’t have to worry about not being able to use your Amiibo the next day, week, or even year!
With that, you should have more than a fighting chance to take on and defeat Ganon! Share your own tips, secrets, and obscurities in the comments section!


Wow, a lot of info here! Thanks! I’ve been keeping some Amiibo’s in the package for collector’s purposes, plus I’ve found (at least personally) that Amiibo support in games has been gimmicky at best, but it looks as if the various Zelda Amiibo actually give you cool stuff in Breath of the Wild!